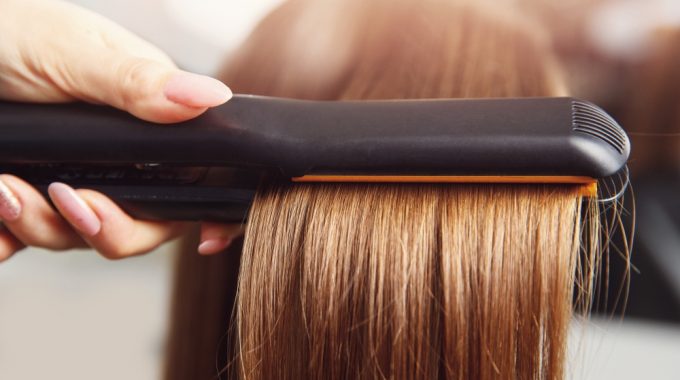
Are you tired of dealing with burnt hair all the time you use a straightener?…
Step by Step Guide: How to Crimp Hair with a Flat Iron
Contents
hide
I can bet on this that every girl would have wanted a crimped hair look once in a life and would have ignored her craving for it because they did not own a crimper. If you are one of those girls, then let me give you the good news that even if you do not have a crimper, you still can have crimp hair with the help of your flat iron and some extra other tools that are easily available at your home.
An easy method to crimp your hair using a flat iron
This article will help guide you on how you can crimp your hair using a flat iron. Follow the step-by-step guide.
Step1. Create tight crimps
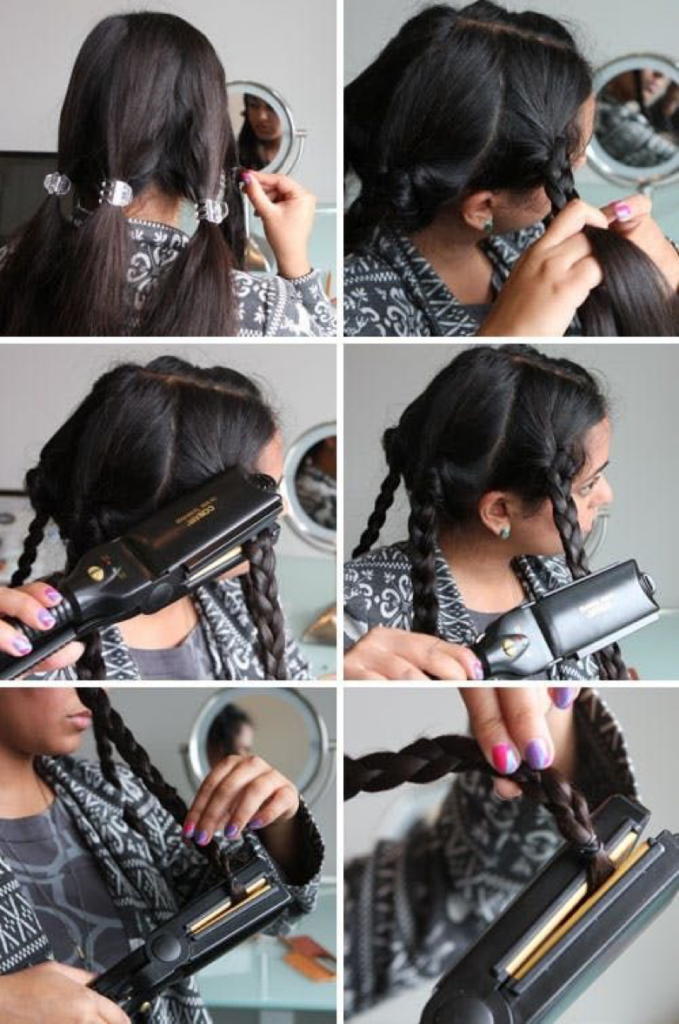
First of all, to get the crimp hair look, you will have to create tight crimps in your hair. You can do it by using braids. Start with brushing your hair so that there are no tangles in them. Your hair should be dry and straight. If you have curly or wavy hair, then it is better to start by straightening your hair with a flat iron so that your hair is free of tangles and frizz.
Step2. Get yourself a hair spray
Hair spray or style mousse has amazing advantages, and one of them is that it holds your curls in your straight hair for a long time
- Make sure that you carefully spray your hair and ensure that the hair spray you are using is also a heat repellent and it does not cause any kind of damage and provides a shield to your hair from the heat which you will give your hair to form crimps.
- Start spraying the hairstyling mousse on the braid from the front and the back. The hair spray helps you secure your hair from drying out.
Step3. Start sectioning your hair.
Now you have to start forming sections in your hair. Start tying your hair in a loose bun and leave the hair off your back and lower head. This left hair is going to be crimped. Then start dividing your hair into six sections. The more the section, the tighter your crimps will be. For a tighter crimp in your hair, it is better that you take 0.5 to 1 inch of hair.
Step4. Braid your hair in sections
As you have divided your hair into sections, now start branding your hair. Braid your hair tightly in small sections to create tight crimps in your hair.
If you need volume in your crimp hair look, then you can try braiding your hair from right from the roots. Similarly, if you want less volume, then braid your hair halfway down. After you are done braiding your hair, you should tie them with elastic.
Step5. Apply the flat iron
The next step is to pick up your flat iron and apply it to your braids. If you made your braid from the roots of your scalp, then start ironing them from your roots but make sure that you are not that close to your scalp that you burn yourself.
- Put the flat iron there and come down slowly with the length of your hair.
- Keep the pace of your flat iron coming down slowly so that the braids can absorb the heat and get styled.
Continue repeating the same procedure on the other braids. You try running your flat iron on your braids twice for the quality of results.
Step7. Time to crimp the upper portion of your hair
Make sure that you do not touch the braids. You just used the flat iron. They are going to need time, so now you have to start focusing on the upper portion.
- Now that you are done with the lower part, you have to open the bun of your hair.
- After opening your hair, you will have to repeat the process that you did in the lower portion.
- Start making braids in your upper portion and use flat iron over the braids.
Before applying the flat iron to crimp your braids, do not forget to spray your braids with the hairstyling mousse or a heat repellent spray so that the flat irons’ heat does not damage your hair.
Step8. Untie your braids
Okay, so now, coming to the final part of the crimping process, after you feel your hair has cooled down from the heat, now it is time to start untying your hair. As you are untying your hair and opening them slowly, you will see the crimps falling out of your hair on your shoulders.
Try not to brush your hair immediately after you open them from braids because this is the great reason for causing frizz in your hair. If you feel like your crimps came out too tight, then you can try loosening them up using your fingers by sliding them in your hair and running them downward. However, do not brush them.
Step9. Use your hair spray to hold your crimps.
Now that your hair is all crimped do not forget to apply your hair spray so that your crimps are long-lasting. This hair spray is going to keep your crimps in your hair all day long in the same position, and your hair is going to smell heavenly too.
Final Thoughts:
Above are some of the easiest steps that you can use to make crimp hair look for yourself at your home. This method requires a bit of effort in making the braids in your hair and then opening them, but this saves you from the worry of not having a crimper on hand at your home to flaunt your crimp hair look.
All you will need is the flat iron and some elastic band to tie your braids, and you are good to go. Take care of doing steps carefully to get good results.
Related Posts